Re-share posts automatically
Keep your social media feed updated automatically with awesome content and save valuable time for reviving your evergreen content and images.
Re-sharing your evergreen content automatically helps you to revive your best content from time to time. Automatic re-posts also make it easy for you to create your perfect content mix of evergreen content with new posts and curated content to keep your social feeds interesting, rich, and diverse. Automate your resharing process with Blog2Social, so you can use your valuable time to create new content and interact with your community.
It’s easy: Define which blog posts, pages, or custom post types you would like to revive, as well as the time and interval and Blog2Social, will fill your social media feeds for you automatically.
>> Follow our YouTube Channel for more useful Blog2Social tutorials <<
The Re-sharer supports the following social media networks
- X / Twitter
- VKontakte
- Flickr
- Diigo
- Telegram
- Ravelry
- Discord
- Mastodon
How to automatically re-share content with Blog2Social
Click on “Re-Share Posts” in the Blog2Social menu to open your “Re-Share” Settings.
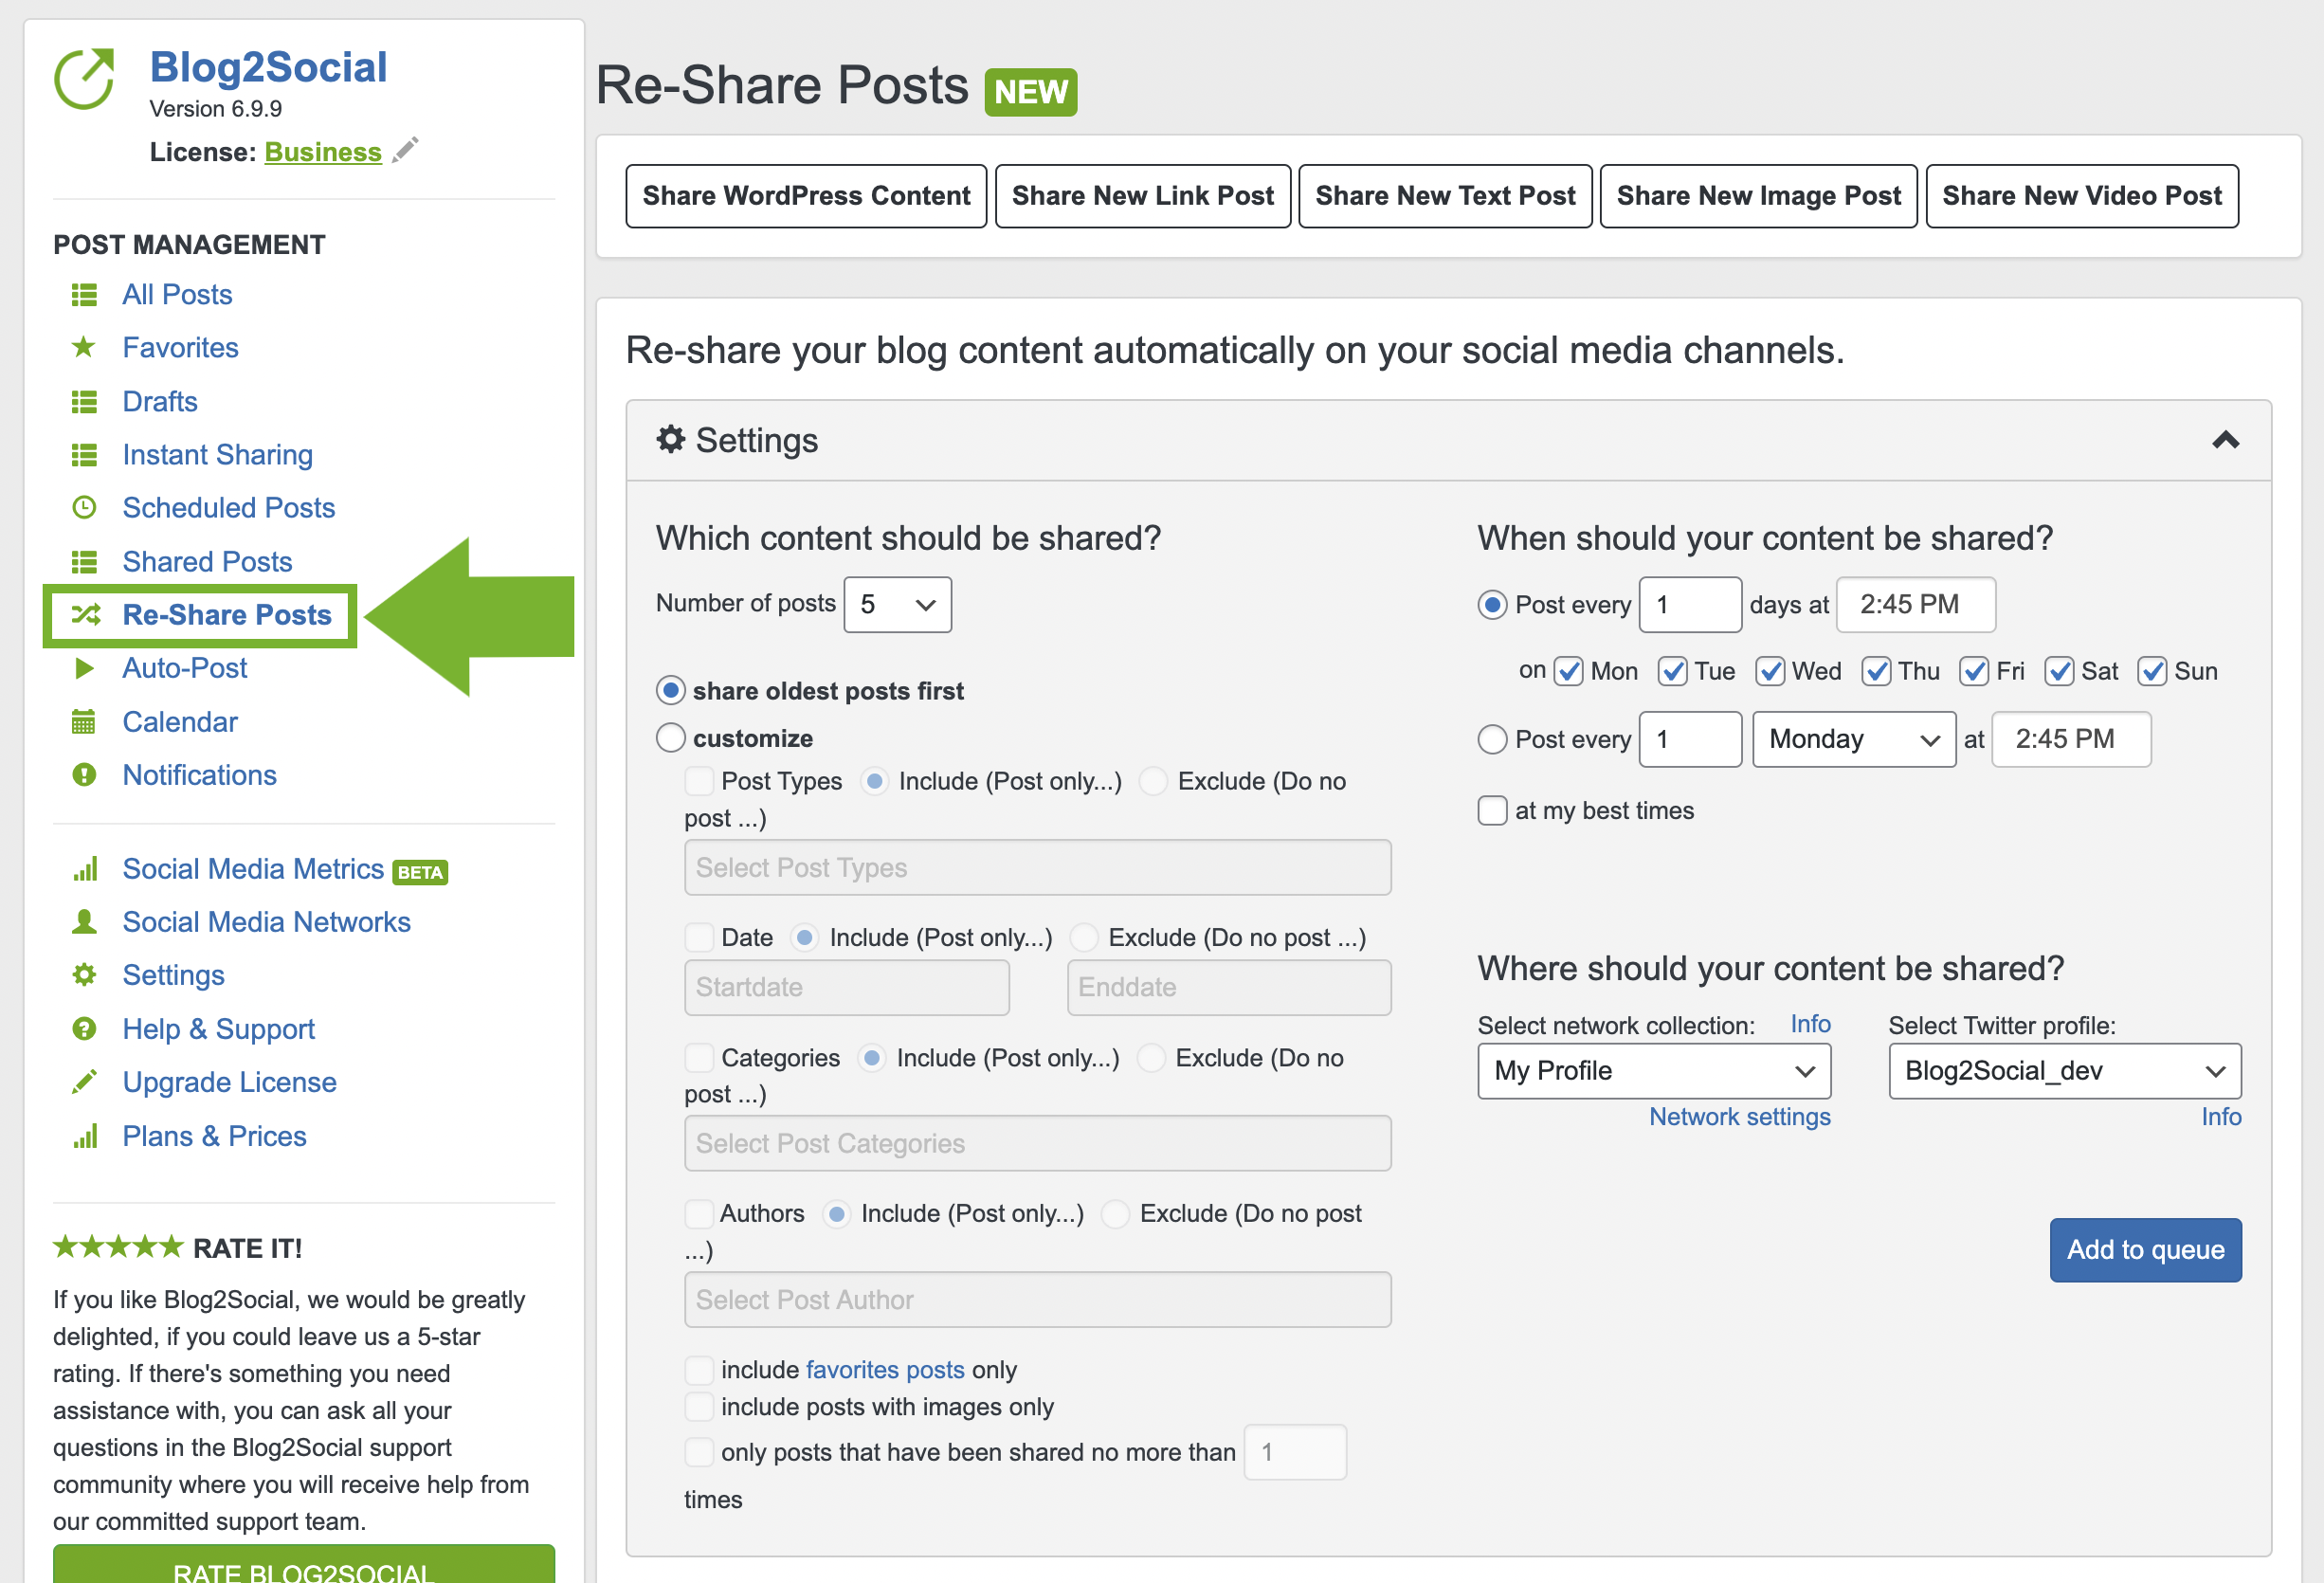
Step 1 - Define how many posts you want to add to your sharing queue

Select from the upper left drop-down menu how many posts should be added to your queue. You can choose to add 5-100 posts. Depending on your Blog2Social license, your re-sharing queue can be filled with 25 (Smart), 50 (Pro) or 100 (Business) posts in total. If you try to add more posts than your quota allows, Blog2Social will fit as many posts as possible from your selection. This also applies if there are already posts in your queue. You can see your queue below the settings.
Step 2 - Define which posts should be shared
You can now select which type of content you would like to add to your re-sharing queue.

You can either select to share your oldest posts first or you can customize your selection by choosing to add content by:
- Post Types
- Date
- Categories
- Tags
- Authors
- Favorites only
- Posts with images only
- Posts posts that have been shared a maximum of "1" times

You can combine multiple options to exactly define the posts you want.
For example, if you want to re-post only selected posts (marked as favorite post) and only the most recent posts from a specific category and from a specific author, you can combine your settings as follows:
1. Post Types [Post]
2. Date [01.01.2021 - [28.07.2021]
3. Categories [Social Media]
4. Authors [Alexander]
5. Only include favorite posts
7. Consider only posts that have been shared a maximum of “1” times

With these settings, only 5 of your favorite posts, created between 01.01.2021 and 28.07.2021 in the category Social Media, published by a specific author and filtered by a custom selection will be added to your queue.
Step 3 - Define when your content should be shared
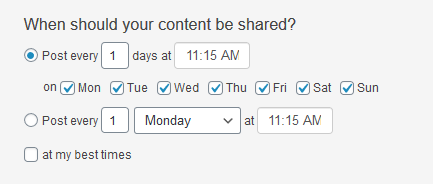
Select from the upper right menu the intervals for re-sharing your content.
You can choose to post every X days at a certain time and select which days your posts should be posted. For example : Post every [3] days at [12:15] on Monday, Wednesday, Friday, and Sunday.
You can select to post on every X specified weekday at a certain time. For example: Post every [3]rd [Saturday] at [12:15]
Instead of adding a time, you can also use the best times for both planning options.
Step 4 - Select on which social media channels your content should be re-posted
Select the network collection with the social media accounts you want to re-share your posts to.
If you have more than one Twitter account in this network collection, please select a primary Twitter account.
Step 5 - Add your content to your sharing queue
If you are happy with your selection and time settings, click on “Add to queue”. The selected configuration of your settings can be saved permanently. (optional)

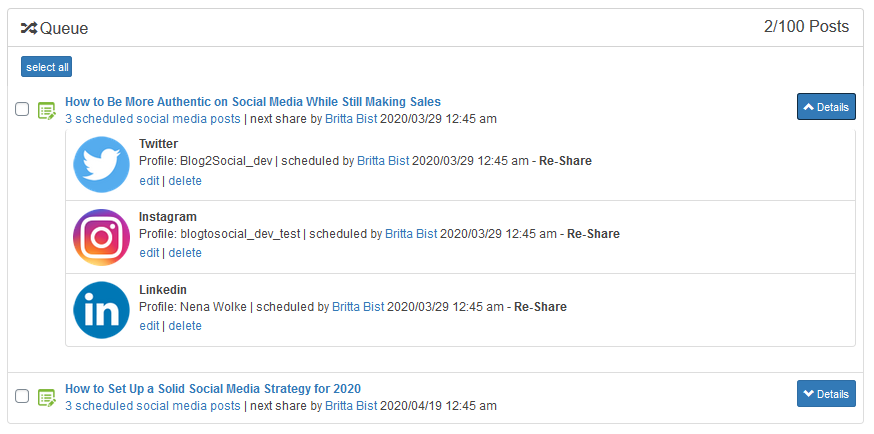
Step 6 - Organize your sharing queue
Your sharing queue shows all the posts you have added to be re-shared automatically. For every post, you can see how many social media posts are scheduled, and when the next post will be shared.

Click on “Details” next to your post to see on which social media accounts your post will be shared and when.
You can also delete content from your sharing queue if you don’t feel like sharing it any longer or if the content was accidentally added to your queue.

To do this, click on the small checkbox to select a post. Then click on “delete selected posts” at the top. To delete all your queued posts, click on “select all” and then click on “delete selected posts”.
Congratulations, you are done! All the posts in your sharing queue will be re-shared automatically to keep your social media feeds interesting for your followers.
How to change the date and time for individual posts
You can change the time and date of your scheduled posts by clicking on "Calendar" or "Scheduled Posts" in your Blog2Social dashboard:
How to view, edit or delete scheduled social media posts
More automation options with Blog2Social
Tags: automatically, old posts, re-post, re-share, repost, reshare, revive
Most popular FAQs
How to auto post imported RSS feeds
How do I auto-post and auto-schedule blog posts
Solutions: Why does Instagram not publish my post/text?
How do I connect Blog2Social with Instagram?
The connection to the server failed.
How to connect and automatically post to Facebook
I cannot connect my Facebook page
How to automatically re-publish blog posts on Bloglovin’
How to share on Facebook Profiles with Facebook