Today, you learn step-by-step how to connect your WordPress blog to Facebook for auto-posting. Auto-posting on Facebook is perfect for reaching a wider audience. Auto-post on Facebook to gain more outreach and drive traffic to your blog.
Cross-posting and cross-promoting your content to social media is the most efficient way to gain more outreach and drive traffic to your blog. In our blog series, we focus on a different social network each week and demonstrate the simplest way to connect it to your WordPress blog.
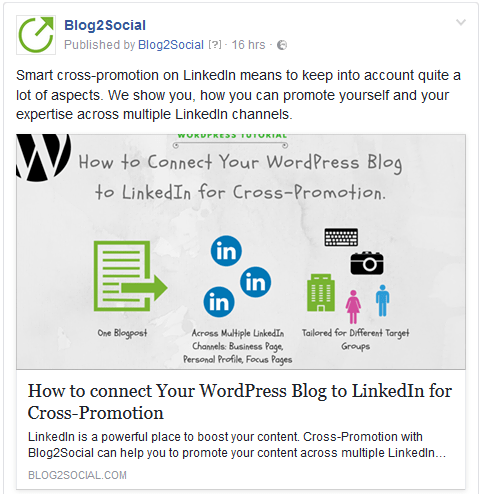
How to connect your WordPress blog to social media for auto-posting.
Today, it’s Facebook’s turn. With over 7.2 billion page visits a day and 1.6 billion users in total, Facebook is, by far, the most popular social network. Thus, cross-promoting blog posts on Facebook is a standard procedure for most bloggers. However, it can be quite time-consuming if you want to optimize your posts for your target group and manually spread them on all your different Facebook channels. Auto-posting can be a great help. Therefore, today, we want to focus especially on how you can speed up your Facebook marketing by auto-posting right from your WordPress editor.
While there are many automation tools out there, Blog2Social is one of the few to offer a variety of custom settings solely for Facebook. In a nutshell, these are the key advantages of Blog2Social for your Facebook marketing:
- Cross-post to profiles, pages and groups to reach various target groups
- Optimize your posts with individual comments, #hashtags and @handles
- Choose between image posts and link posts as default posting format
- Posts at the best times for Facebook
Did I catch your attention? Here is how you connect your WordPress blog to Facebook:
Step 1: Install the Blog2Social Plugin on Your WordPress Blog
First of all, let me tell you how Blog2Social works. If you are already familiar with the plugin, you can skip this short introduction and go ahead to step 2.
Blog2Social is a WordPress Plugin and a real time saver. Copying and pasting each and every single post to various social networks won’t be necessary any more. With Blog2Social, you can share and re-publish your blog content automatically from WordPress to Facebook and other social media platforms.
To get going, download Blog2Social from the WordPress directory in your WordPress plugin section. Afterwards, install and activate the plugin and you are ready to go. It’s free.
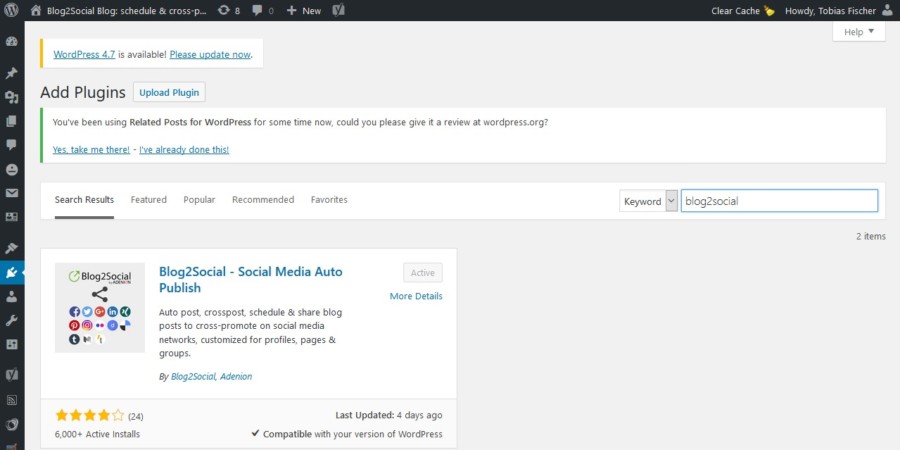
See more detailed instructions: How to install the plugin Blog2Social on your blog
Step 2: Connect your WordPress Blog to Facebook for Auto-Posting
Once you have installed and activated Blog2Social on WordPress, the Blog2Social Icon will appear in your WordPress Dashboard. Click on the icon to reach the network section and connect your Facebook account. You can connect Blog2Social to personal profiles, business pages and even to the Facebook groups you are a member of.

When you type in a username and password, the respective Facebook account will be automatically connected with your WordPress blog.
Step 3: Auto-post your WordPress Blog Post in the Ideal Format and at the Right Times to your Facebook Profiles, Pages and Groups
After you have installed Blog2Social, you can auto-post, cross-promote and re-publish your blog content to any social network you have connected to the plugin. Since we are focussing on Facebook, I will show you which settings Blog2Social offers specifically for auto-posting to Facebook.
3.1. How to Auto-Post and Auto-Schedule new Blog Posts on Facebook Profiles, Pages and Groups
Once you have written a new blog post, you have two options to share your post on social media: “Auto-Posting” or “Custom Sharing & Scheduling”. Auto-Posting is the quickest way to share your blog posts.
To set the Social Media Auto-Poster into action, just tick the box “enable auto-posting” in the right sidebar of your WordPress editor in the section “Share on Social Media” and choose a pre-defined selection of networks you want to post to. If you didn’t select specific sets of networks, your post will be shared on your default selection of network profiles, pages and groups of the connected network.

If you set the auto-poster to share your post “immediately after publishing”, Blog2Social will automatically share your post as soon as your blog post is published.
Alternatively, you can select an individual date and your pre-defined time settings to schedule your social media post and have Blog2Social share it at the best times to post on each network. If you haven’t defined any custom time settings, Blog2Social will schedule your social media posts automatically with the pre-defined “Best Time Manager.”

This way, you can share your post immediately on your publishing date or schedule your social media postings in advance, in just a few clicks. You can also apply the auto-poster and auto-scheduling on blog posts which you have not yet published but scheduled on your WordPress blog. Depending on the social network you are posting to, the auto-poster will automatically add a comment with the appropriate character count and hashtags to your posts.
You can also apply these auto-posting settings for your scheduled blog posts. So, you can plan and schedule and share everything in advance, your blog posts as well as your social media posts.
To set your social media sharing on complete autopilot, you can choose to auto-post by default. Your blog posts will then be posted to all your pages and groups the moment you click on publish – every time you publish a new blog post. For Facebook profiles, the posts will be scheduled and automatically moved to the “Instant Sharing” tab after your blog post is published, where you can share them on your Facebook profile.
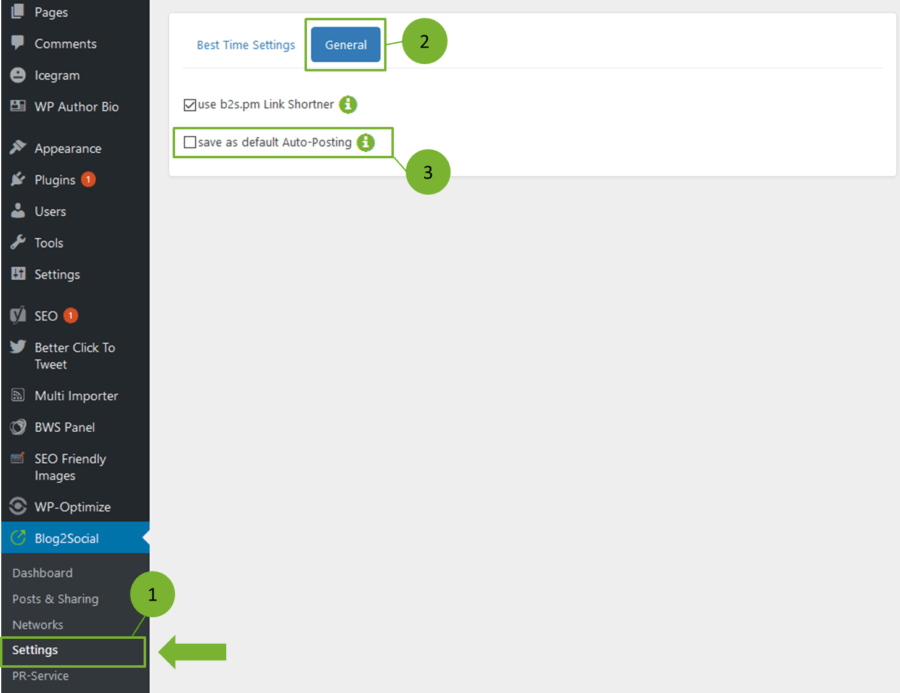
To enable auto-posting, please go to the Blog2Social Settings and select the tab “general”. Here you have the option to activate the auto-poster by default.
The FAQ: How do I auto-post and auto-schedule blog posts on social media with the Social Media Auto-Poster? provides a step by step guide for the Blog2Social Auto-poster.
3.2. How to use Custom Sharing and Scheduling for Blog Posts on Facebook Profiles, Pages and Groups
If you prefer to give your posts a more personal and individual touch, I recommend going just one more step with the “Custom Sharing & Scheduling” option to customize your social media posts before you schedule and share them. The “Custom Sharing & Scheduling” option allows you to individually edit all your social media posts in a one-page overview. In chapter 3.3 I will explain how you can benefit from even more custom settings for the promotion of your blog posts on social media. But first, let’s have a look at the “Custom Sharing & Scheduling” feature.
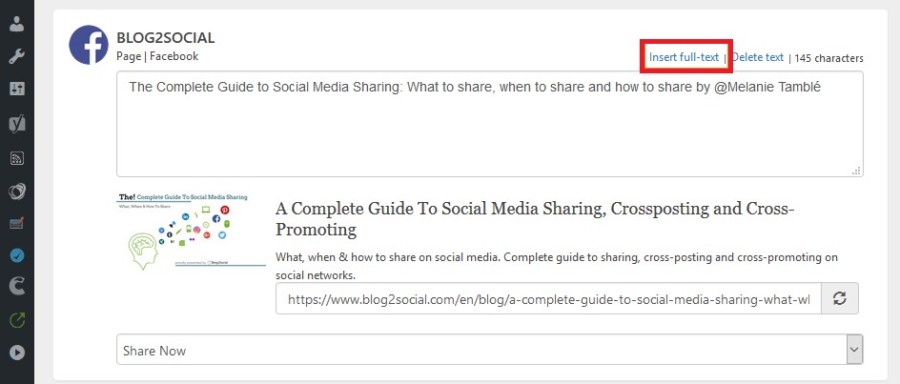
Personal posts with individual comments can trigger engagement and increase your visibility. A click on “Customize & Schedule Social Media Posts” will lead you straight to the Blog2Social one-page preview editor where you can customize your posts to your specific audience.

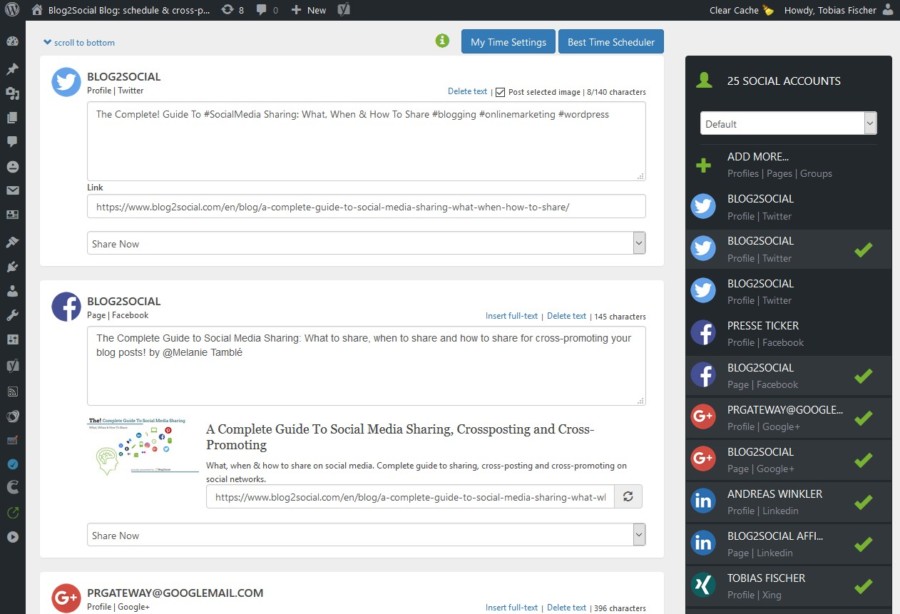
You can individually modify the pre-filled text and add hashtags and handles. If you wish to insert the full text or use just the first section of your blog post as introduction for your Facebook posts, just click the desired option.
Every community is different, has its own preferences and social rush hours. A basic knowledge of your Facebook community, is crucial for your social media success. Try to become familiar with the preferred times of your followers and incorporate them in your Facebook strategy. This way you can improve your outreach and receive more attention. The best times to post to on Facebook might give you a basic orientation. If you do not know the best times for your networks, you can also adopt the default Best Time Scheduler, provided by Blog2Social. This planner is based on a comprehensive research of various sources and experience of established social media experts. Alternatively, you can also set your own time settings.
If you are ready to go, just click “share” and your post will be automatically cross-posted to Facebook pages and groups or move to the “Instant Sharing” tab for Facebook profiles. You can also cross-promote your post to any other social network you chose in the right sidebar of your Blog2Social dashboard. All postings will be published automatically according to your individual scheduling plan.
To see all of your published or scheduled social media posts, click on “Posts & Sharing” in the Blog2Social section of your WordPress navigation bar. Here a calendar view offers orientation on when, where and what you have posted. Additionally, a drop down menu displays various detailed information. In this section, you can change your scheduled times and partially or entirely delete your scheduling scheme.
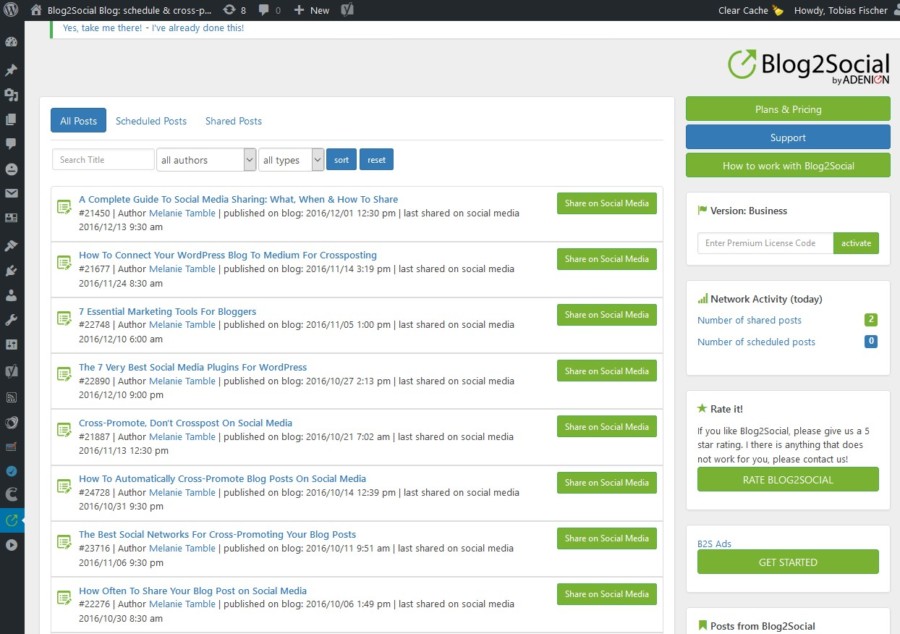
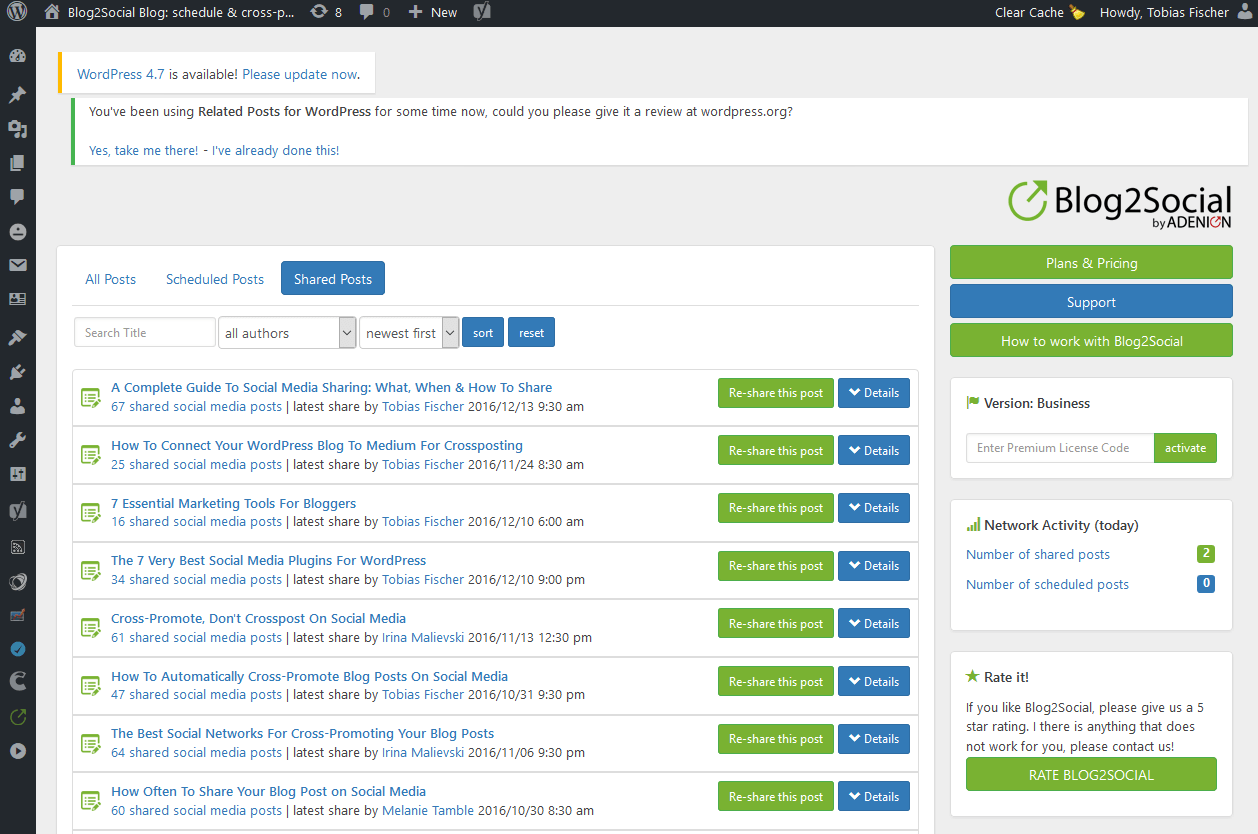
You can view your published posts in the report.
3.3. How to Post in the Ideal Format for Facebook
After we have talked about how you can customize your posts to your specific target group, let’s have a look at the formats you can post in, as well as their advantages. You can share any combination of videos, images, texts and links on Facebook. While all of these posting formats have their advantages, especially posts with visual content perform great on Facebook. For this reason, Blog2Social provides two different posting formats specifically for Facebook, which you can choose as the default setting for your posts.

Simply go to “Setting” in your Blog2Social dashboard and select the tab “Network Settings”. Here you can select whether you want your blog posts to be shared as a link post, with an automatically generated link preview, or as an image post with an individual comment containing the link to your website. If you choose the image post option your followers can click on the images or info graphics you’ve shared and view them in the Facebook preview. The URL in the comment will still lead your followers to your blog. Additionally, all images will be automatically uploaded in your Facebook photo album, making it easy for your fans to go back and visit your website at a later point. If you choose the link post, your followers will be forwarded to your WordPress blog as soon as they click.

Selecting the ideal post type for your target audience strongly depends on your content and the preferences of your unique community. Link post might increase the click rate on your blog while image posts could lead to more engagement. To find out what works best for you, you can simply select the two different posting formats when scheduling with Blog2Social and monitor your performance.
Take a look at our blog posts How to Boost the Organic Reach of Your Facebook Posts with Smart Social Media Automation to see how we monitored the performance of link and images posts for our blog posts and how changing the post type resulted in a much better visibility for our posts.
3.4. How to Re-Publish old Blog Posts to Facebook in just a few Clicks
Another asset of Blog2Social is the option to re-publish your older posts on Facebook. There are two ways to do so. First: You open an old blog post in your WordPress edit mode and take the road described above, in section 3.2. Second: You go straight to the Blog2Social dashboard and choose “All Posts” and click on “Re-share this post”. You will then choose the networks you wish to re-publish your content to. And again you may schedule your posts according to the best time for each network.
Conclusion
Social media are the most powerful sources to drive traffic to your blog. The more value your blog content provides, the more likely your followers will like your blog and your business. Facebook may be just one social network. But it is a real traffic powerhouse. With all its features, especially implemented to improve the cross-posting on Facebook profiles, pages and in groups, Blog2Social helps you to make the most out of your blog marketing.
However, also consider other networks provided in the plugin to put your WordPress posts in front of different target groups and an engaged audience.
After graduating from Heinrich-Heine University in Düsseldorf with a Master’s degree in liberal arts, Tobias Fischer is now responsible for online PR, content marketing and social media at ADENION GmbH.