How to view, edit or delete your scheduled Social Media Posts
With Blog2Social, you can view, edit or delete your scheduled social media posts.
Therefore, you can click on
"Social Media Posts" -> "Calendar"
or
"Social Media Posts" -> "Scheduled Posts" -> "Details" -> "Edit" or "Delete"

If you want to delete all the scheduled posts for one of your blog posts, please go to:
"Social Media Posts" -> "Scheduled Posts" -> "Details"
Now you can see a list of all social media posts planned for this particular blog post. To delete all of them, check the "select all" box, then scroll down and click on "delete scheduling".
Edit your scheduled Social Media Posts
Click on a scheduled post in the calendar to open the edit window.
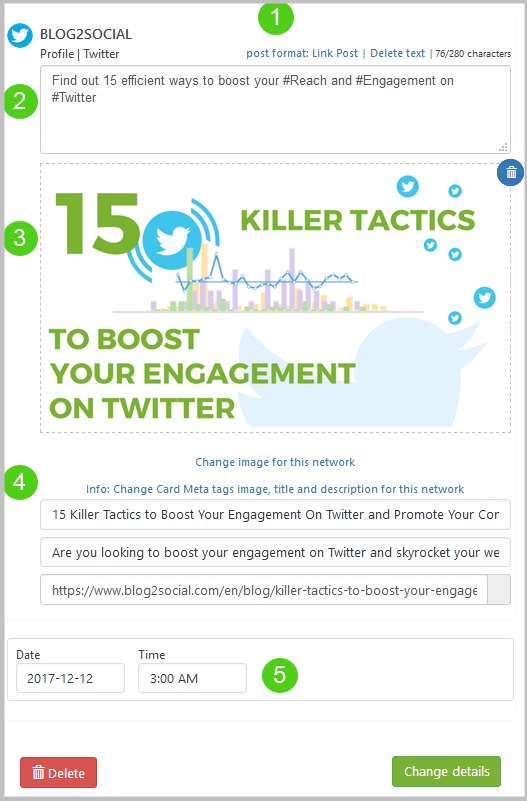
You are now able to:
1) Change the post format of your social media post
2) Edit the text of your social media post
3) Change the image of your social media post
4) Change the Social Meta Tags: Title, description (with Link Post format) and the link to your blog post
5) Change the date and time of your social media post
Click on "Change details" to save your changes.
If you make changes to a post scheduled by another user, the color of the post will change to your color.
View your scheduled Social Media Posts in the Calendar
At the top of your calendar under "Sort by network" you can select whether you want to see your scheduled posts for all networks, or just for specific networks.
You can do so by clicking the "all" button or by selecting the icon of the network you’d like to see an overview for.
Social media posts scheduled by different WP users will be displayed in different colors so you can easily view your own posts.

Additional helpful Guides
- How do I schedule multiple individually tailored Social Media Posts?
- Why are my Posts not being shared?
- How to share multiple images in one Social Media Post?
Tags: calendar, change, delete posts, edit or delete scheduled posts, Scheduled posts
Most popular FAQs
How to auto post imported RSS feeds
How do I auto-post and auto-schedule blog posts
Solutions: Why does Instagram not publish my post/text?
How do I connect Blog2Social with Instagram?
The connection to the server failed.
How to connect and automatically post to Facebook
I cannot connect my Facebook page
How to automatically re-publish blog posts on Bloglovin’
How to share on Facebook Profiles with Facebook