User management: How to assign license keys and social media accounts to other users
Managing a website with a large team?
Whether you're working with editors, social media managers, or an outside agency, Blog2Social simplifies collaboration across multiple social media accounts and roles.
Blog2Social works WordPress user-based, meaning settings and network connections are defined for each user individually. To grant others access to Premium features, simply share your license key or log in as the specific user and enter the key into their account, as shown in this guide:
How do I activate my license key?
Activate Blog2Social Premium for other users by assigning your license key
(Business version required)
For an easier user administration and advanced team management, the Blog2Social Business version provides you with additional options to simply assign license keys as well as social network accounts and auto-poster settings to users from an admin account. The following guide will show you how to manage license keys and social network accounts for multiple users.
This way you can activate and manage license keys for all blog users with minimal effort. There will be no need to disclose license key information to new users because they won’t need to enter the key themselves.
How to activate your Business license key for multiple users
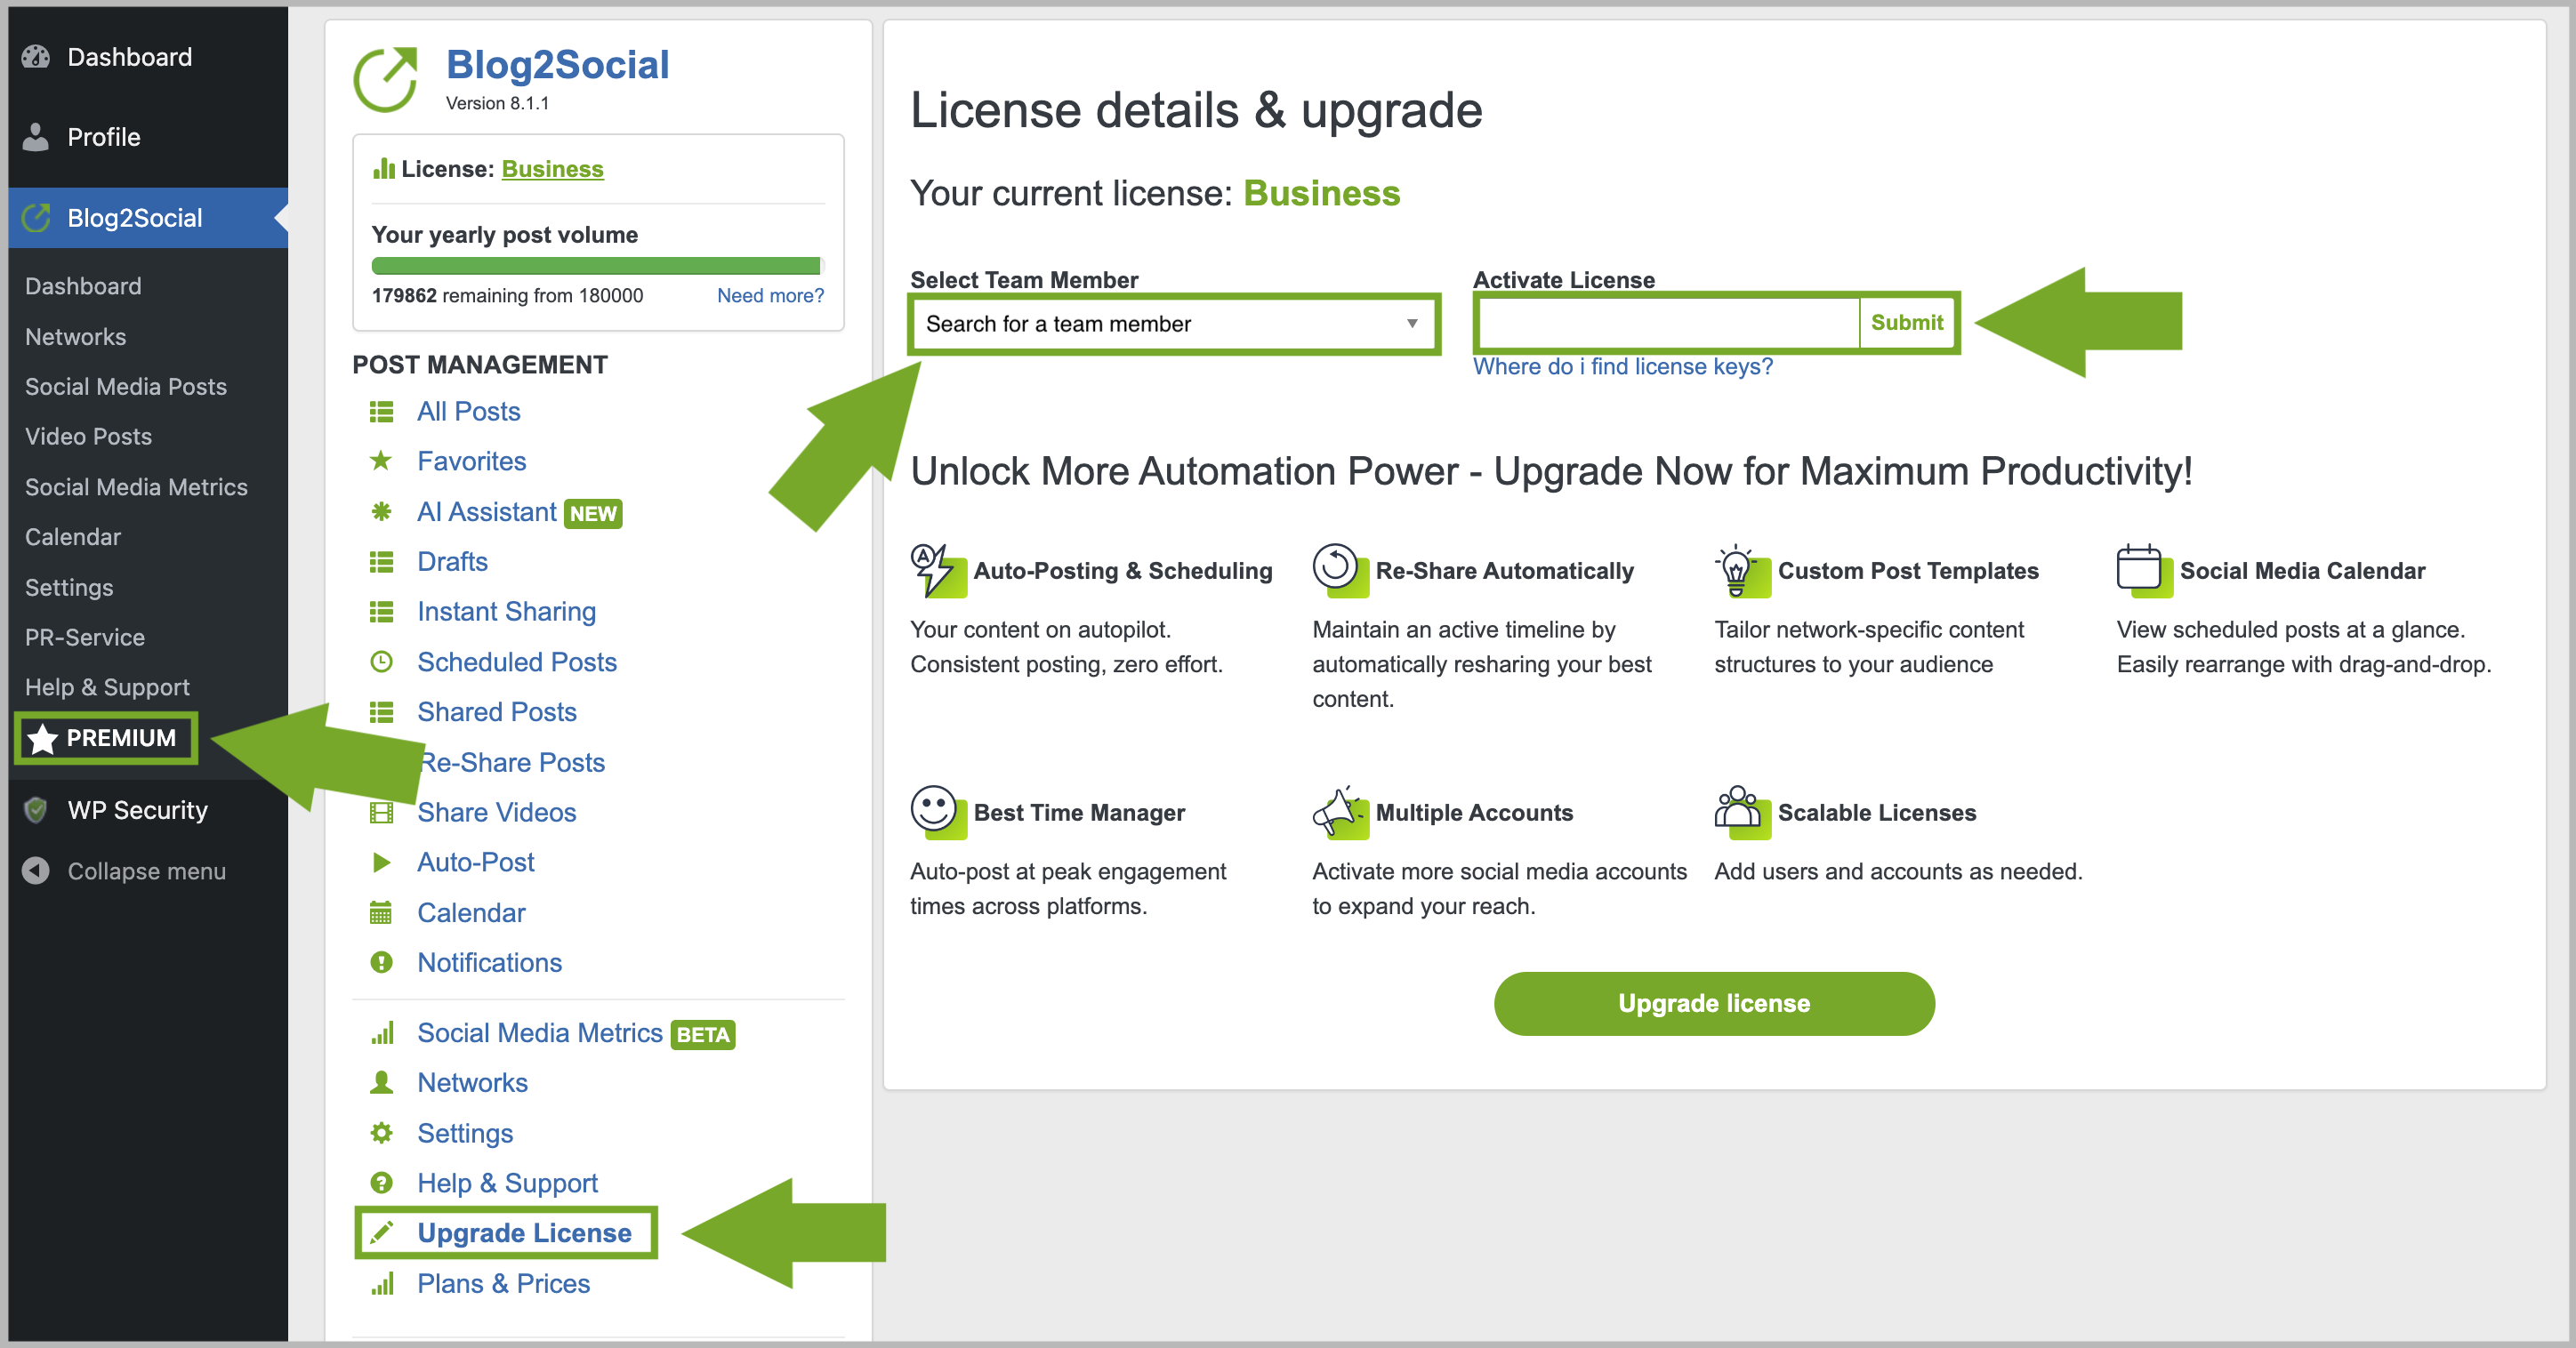
- Go to your Blog2Social dashboard and click "Upgrade Licence" or "PREMIUM".
- At the top of the page, you’ll find a field with your name. Click on it.
- The pop-up "Search for a team member" will open. Enter the name of the user whose license you want to upgrade.
- After selecting a user, enter your license key and click on "Submit".
Assign Social Media Accounts to other users (Business version required)
When you share a Blog2Social license with multiple users, you can now also assign social network accounts to other user accounts. Assigning social network accounts to users enables you to manage social media teams, saving time for the setup, and protecting personal accounts as well as sensible login data. You will always be able to update and delete the assigned social media connections.
How to assign social media accounts in the Business version
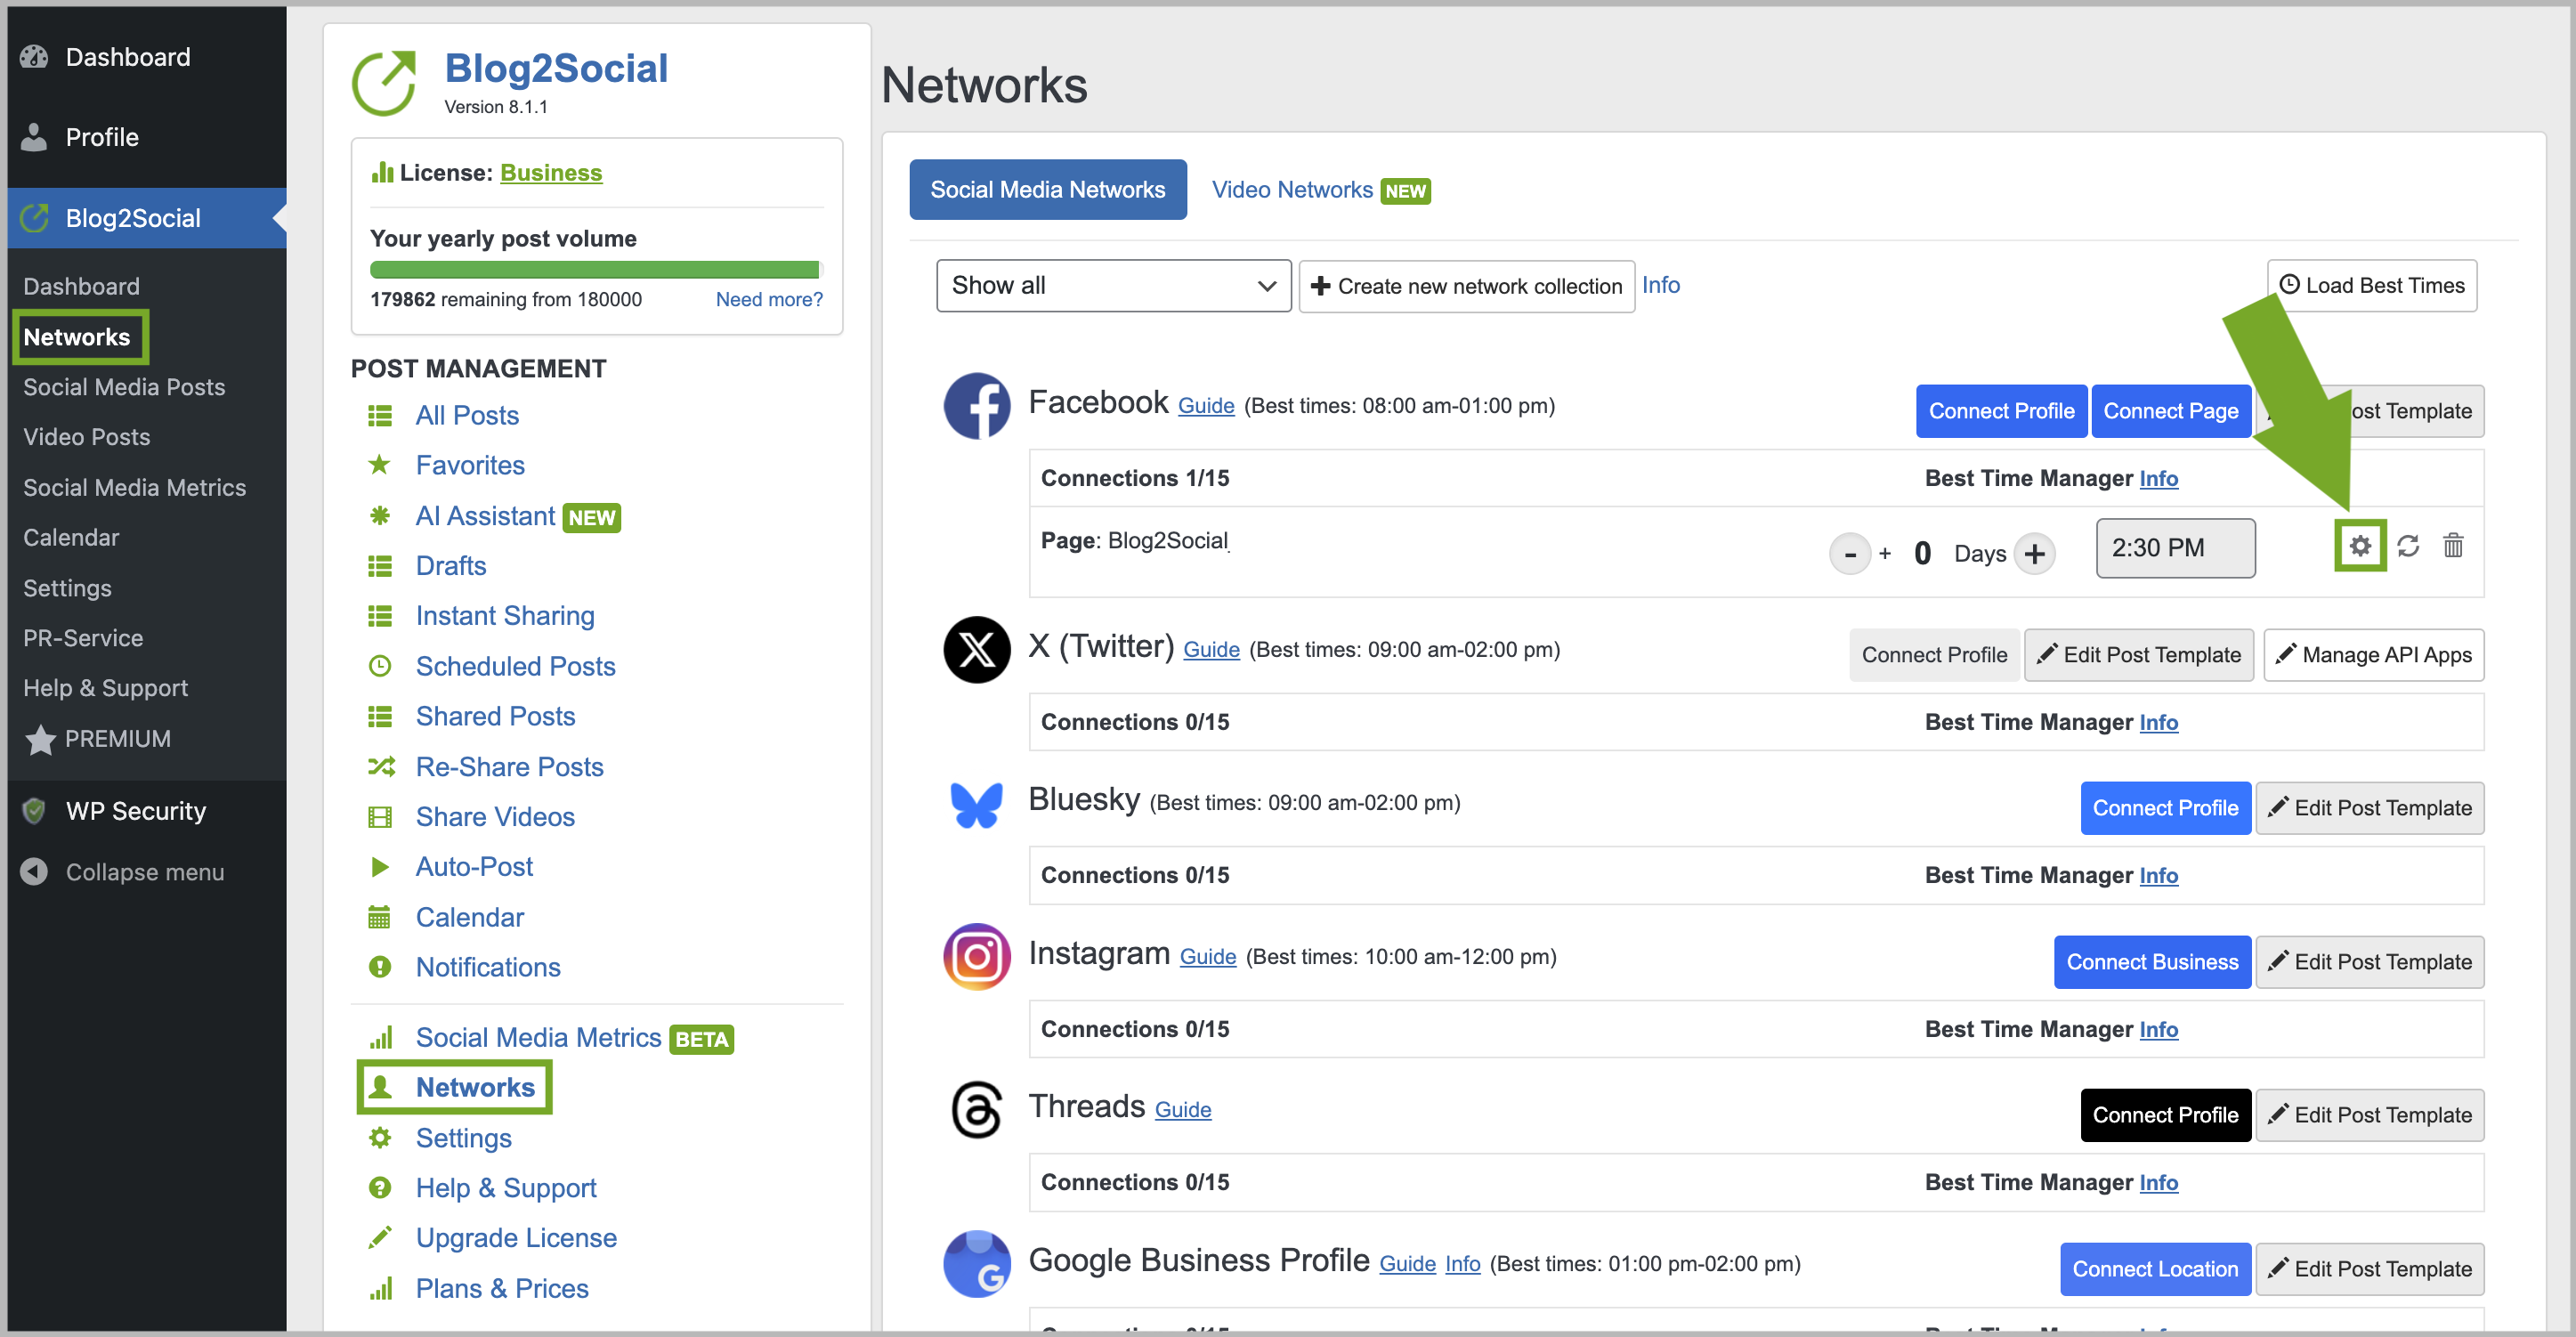
- Go to your Blog2Social dashboard and click “Networks".
- Click on the little gear wheel next to the social media account that you want to assign.
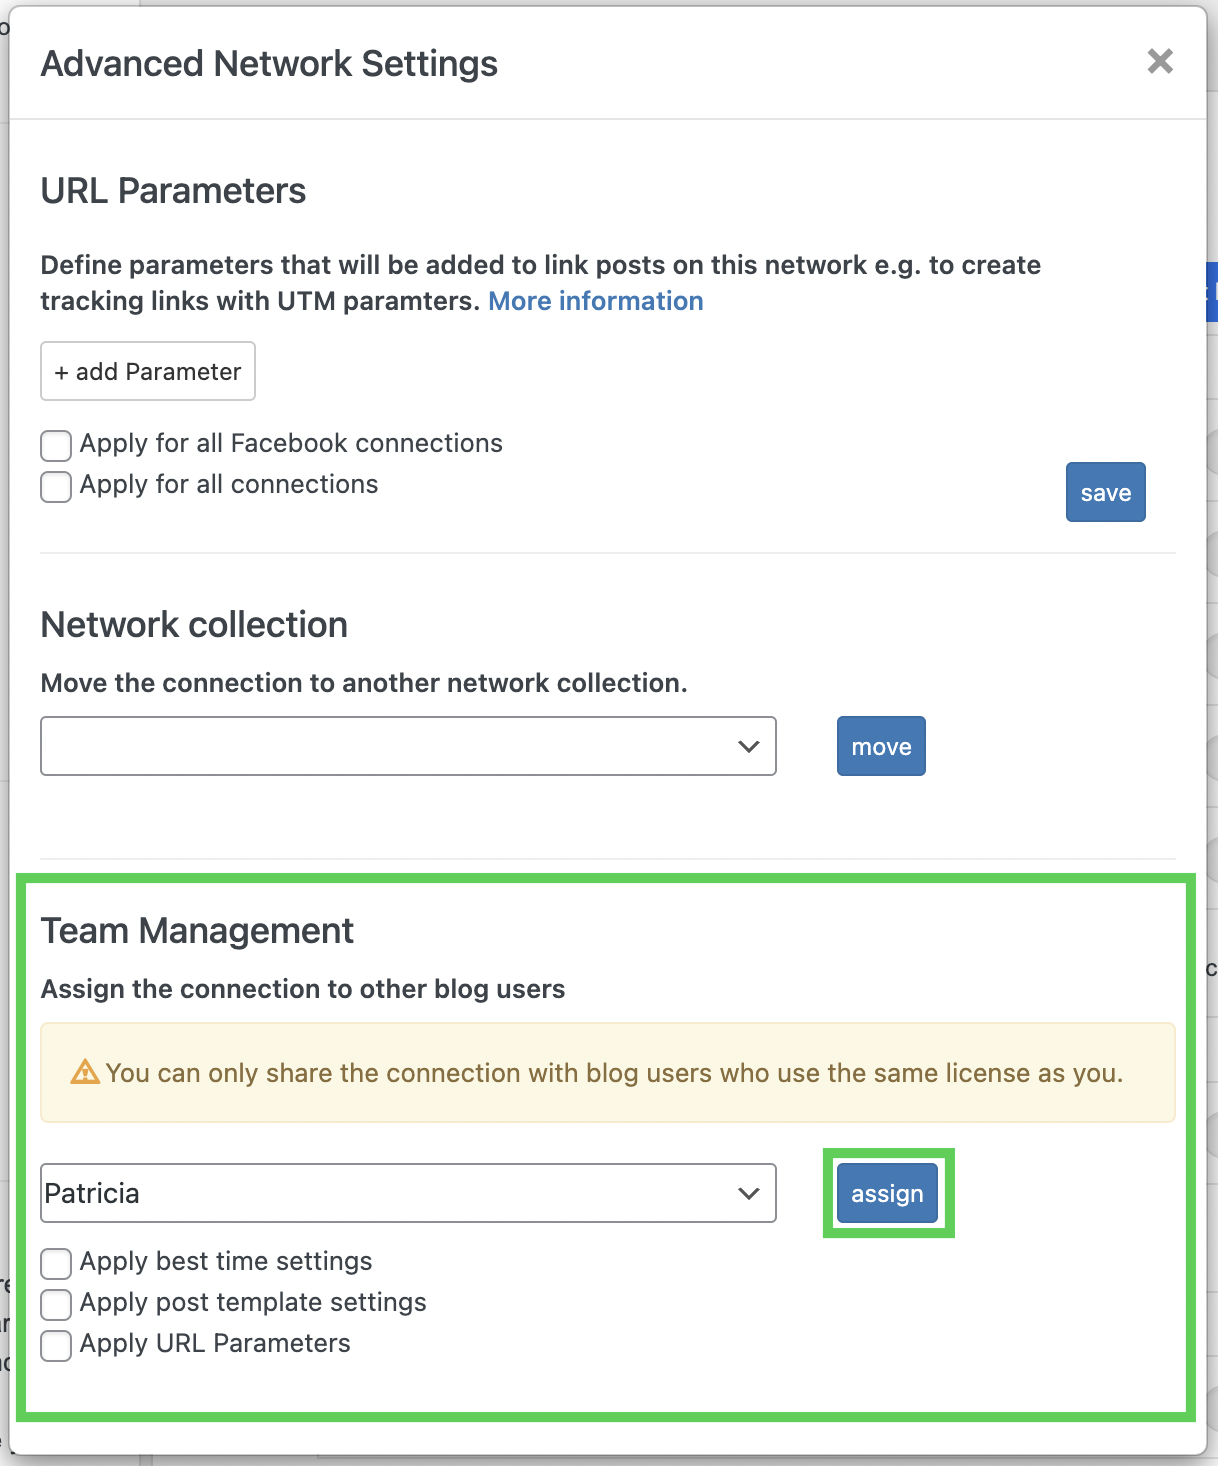
- The pop-up "Advanced Network Settings" will open.
- Select the blog user you want to assign the connection to under "Team Management".
- Click on "assign".
- Repeat with as many network connections as you’d like.
- If you want to delete an assigned network connection, select the connection and click delete next to the user's name.
Of course, users can still set and save their own best time settings for the assigned connections and use their own individual social media profiles and pages. This is especially important for business networks like LinkedIn or XING.
Tags: assign license key, assign networks, multiple users, team options
Most popular FAQs
How to auto post imported RSS feeds
How do I auto-post and auto-schedule blog posts
Solutions: Why does Instagram not publish my post/text?
How do I connect Blog2Social with Instagram?
The connection to the server failed.
How to connect and automatically post to Facebook
I cannot connect my Facebook page
How to automatically re-publish blog posts on Bloglovin’
How to share on Facebook Profiles with Facebook