How to use AI Templates for personalized social media posts
In the fast-paced world of social media, "one size fits all" rarely works. To truly engage your audience, your posts need the right tone, the right length, and a clear call to action.
The Blog2Social AI Templates allow you to automate your content creation while maintaining full creative control. Instead of generic AI output, these templates let you define specific rules, ensuring every post reflects your brand's unique voice and meets your marketing goals across different platforms.
Please ensure that you have at least Blog2Social version 8.9.0 installed to use the AI Templates.
How do I enable and use AI Templates in Blog2Social?
Follow these steps to set up and apply your custom AI template rules:
1) Access the Template Settings
Go to "Networks" within the Blog2Social dashboard and click on "Edit Post Template" next to the specific social network you want to customize.
2) Select the AI Configuration
In the window that appears, select the "Assistini AI Template" tab at the top.
Alternatively, edit this section by clicking "AI Settings" in the Blog2Social post preview.
Note: Make sure to select the specific "Profile" or "Page" in the next step (for example, if you want to apply different rules for your Facebook Profile vs. your Facebook Page).
3) Customize Your Rules
Enable "Define individual AI template rules" under "Advanced AI Settings", then adjust the AI Template settings (Tone, Goal, Length, etc.) according to your preferences as described in the sections below. Be sure to save your changes.
4) Open the Post Preview
Now, go to "Social Media Posts" and select your desired post. Click "Share on Social Media" to open the Blog2Social post preview.
5) Generate Your Content
Simply click on "Rewrite with Assistini AI" below the text field. The AI will now rewrite your post based on your custom template rules.
Understanding the AI Template Settings
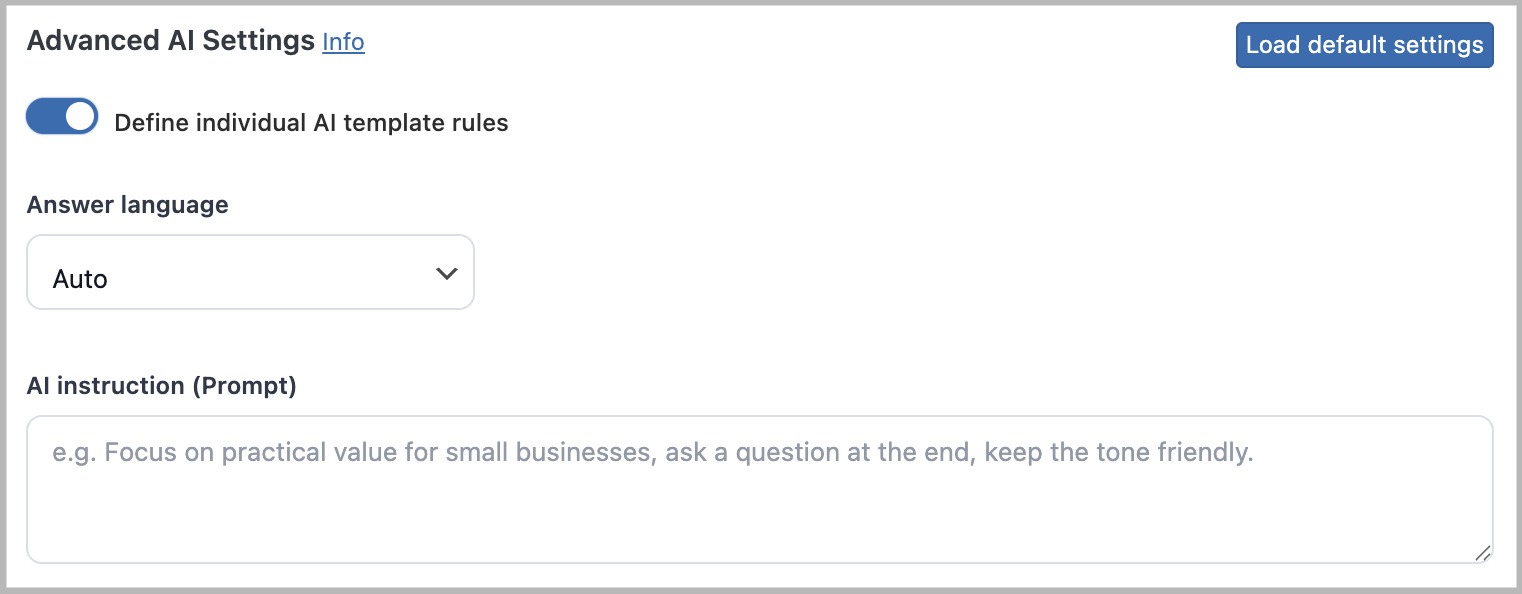
General AI Instructions (Prompt)
At the top of the interface, you can set your preferred language and find the AI instruction (Prompt) field. This is your "creative brief."
- What to do: Provide specific context here. For example: "Focus on practical value for small businesses, ask a question at the end, and keep the tone friendly."
- Benefit: The more specific you are, the less manual editing you’ll have to do later.
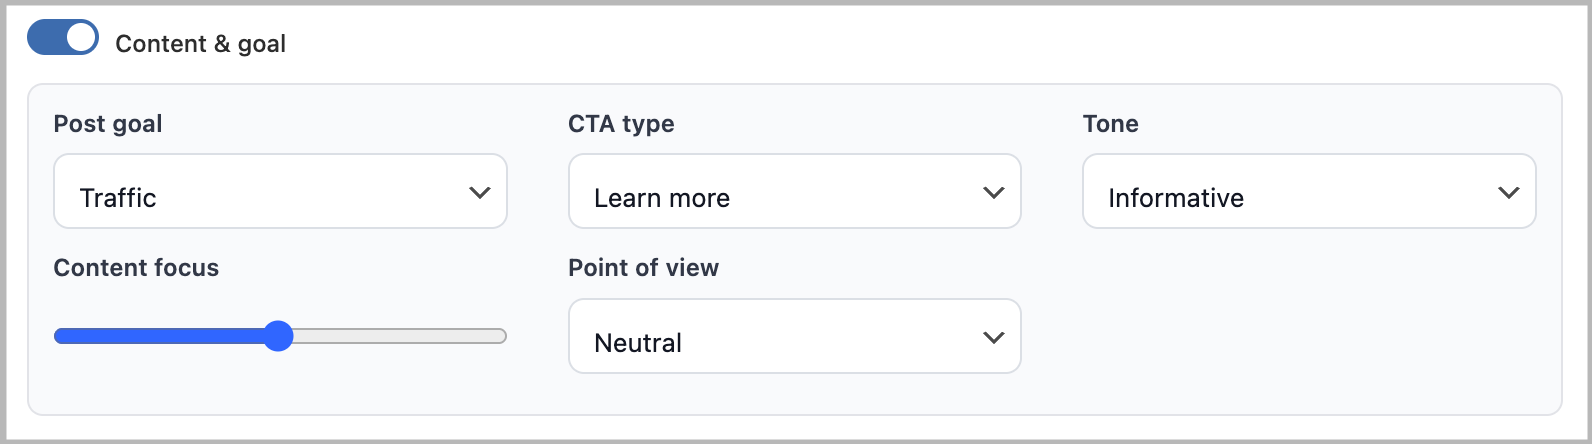
Content & Goal
This section defines the "Why" and "Who" of your post.
- Post Goal: Choose whether you want to generate Traffic, engagement, or awareness.
- CTA Type: Select a Call-to-Action to encourage user interaction.
- Tone: Set the emotional resonance of the post. For example, friendly, informative, or inspirational.
- Content Focus: Use the slider to balance between a broad overview or a specific deep dive into your topic.
- Point of View: Decide whether the AI should use a formal or informal tone when speaking to your audience.
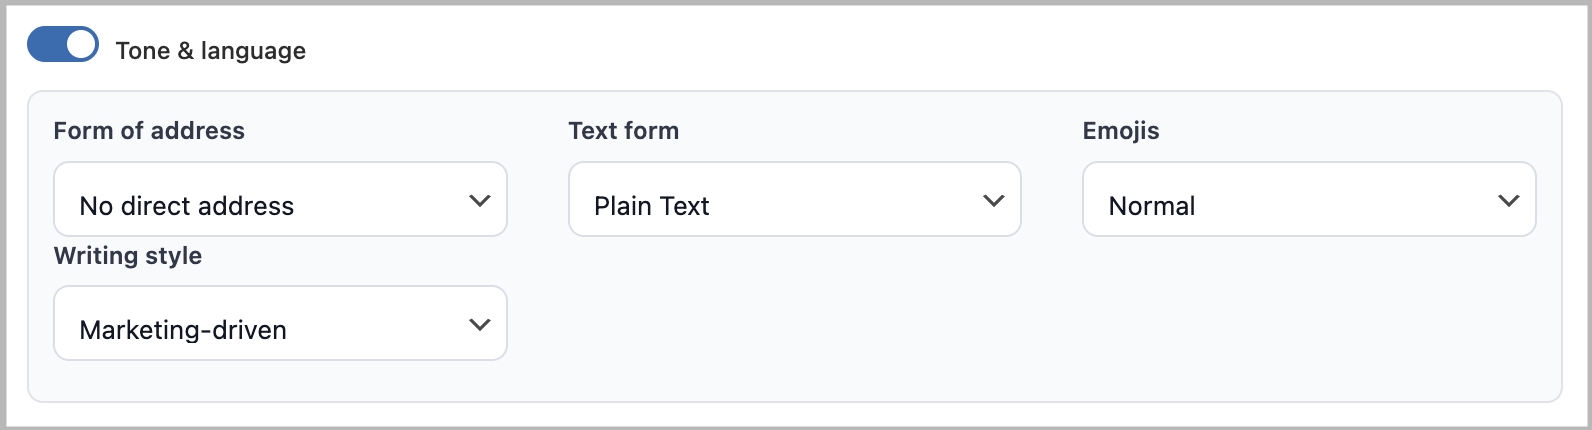
Tone & Language
The "vibe" of your post is just as important as the information it contains.
- Form of address: Choose between formal or informal addresses (especially important for languages like German or French).
- Text form: Specify the structure of your output. For example, plain text, bullet points, or a question at the end.
- Emojis: Control the visual flair of your post. You can set them to "Normal“, „Subtle“, or "None" depending on the platform (e.g., more for Instagram, fewer for LinkedIn).
- Writing Style: Set these to "Professional“, „Marketing-driven“, or "Neutral" to match your brand identity.
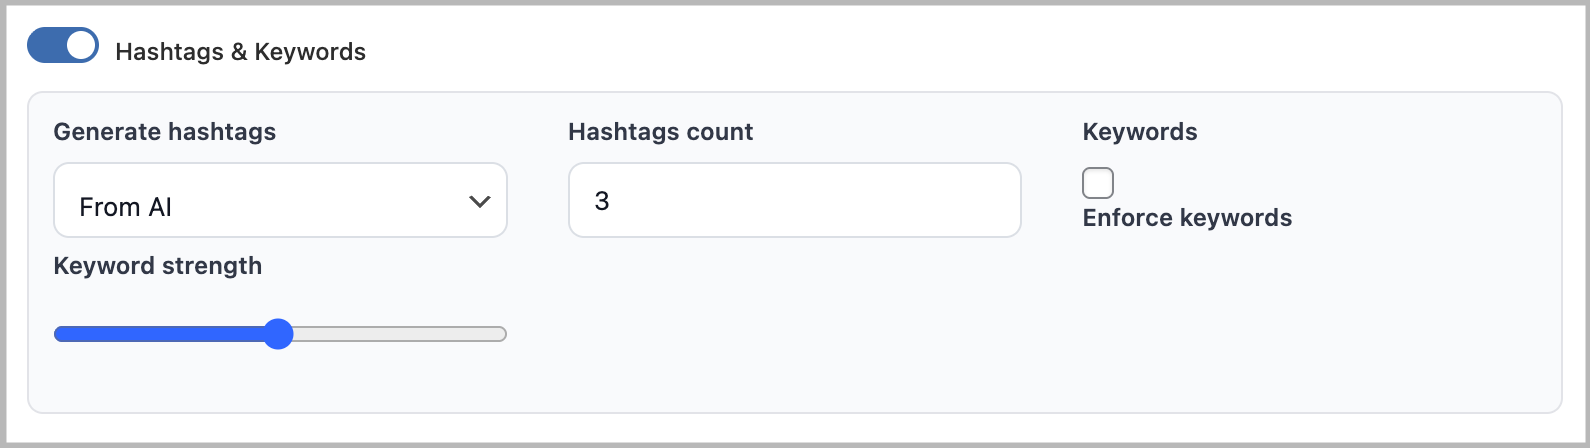
Hashtags & Keywords
Boost your reach by automating your metadata.
- Generate Hashtags: Let the AI extract relevant tags directly from your content.
- Hashtag Count: Define exactly how many hashtags you want (to avoid "hashtag stuffing").
- Keyword Strength: Use the slider to determine how strictly the AI should stick to your primary keywords.
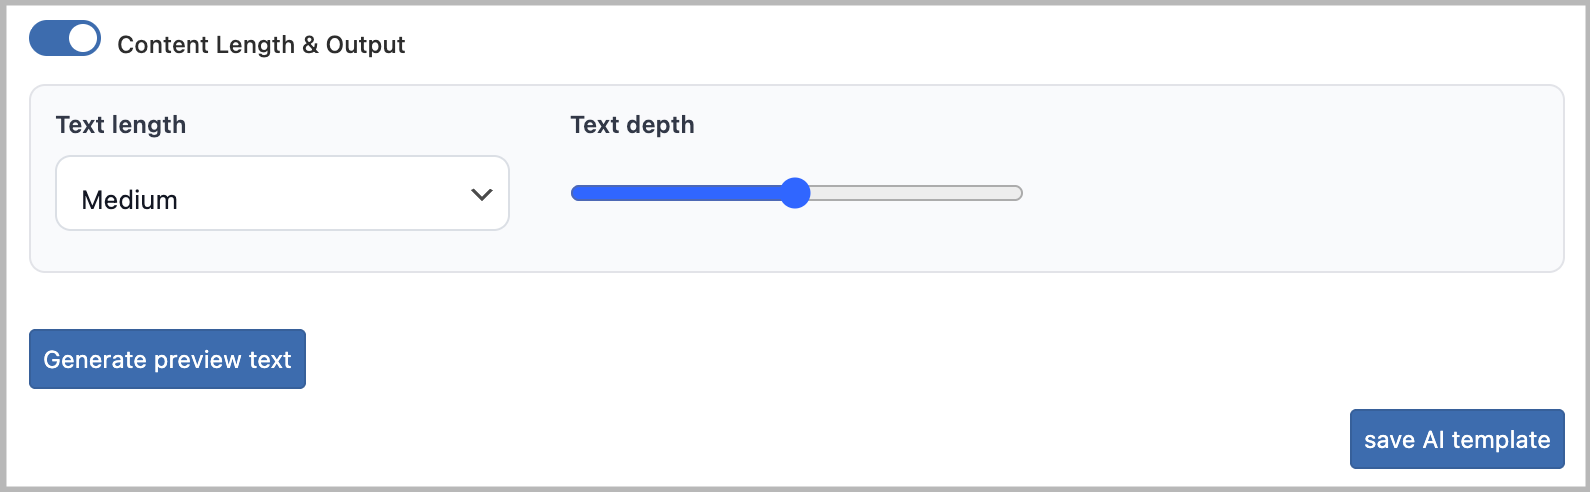
Content Length & Output
Finally, decide how much space your post should take up in the feed.
- Text Length: Choose between "Short" (great for X/Twitter), "Medium“, or "Long" (ideal for Facebook or LinkedIn).
- Text Depth: Adjust the slider to determine how detailed or "snackable" the information should be.
Once you have configured your perfect setup, use the "Generate preview text" button at the bottom to see your rules in action. Confirm your changes by clicking "save AI template".
Other helpful guides
- How do I post content as the first comment of my social media post?
- When I post to Facebook, no image or the wrong image appears in my post. Why?
- How to share my Post as a Story on Instagram?
Tags: AI Templates, How to use AI Templates
Most popular FAQs
How to auto post imported RSS feeds
How do I auto-post and auto-schedule blog posts
Solutions: Why does Instagram not publish my post/text?
How do I connect Blog2Social with Instagram?
The connection to the server failed.
How to connect and automatically post to Facebook
I cannot connect my Facebook page
How to automatically re-publish blog posts on Bloglovin’
How to share on Facebook Profiles with Facebook