How do I auto-post and auto-schedule blog posts on social media with the Auto-Poster?
The Blog2Social Auto-Poster is the perfect tool to streamline your social media management and save valuable time. With its powerful features, you can automatically share your content on social media to ensure it reaches the right audience at the right time. It simplifies the process of Auto-Posting your content, allowing you to automatically schedule on social media platforms and focus on what matters most – creating great content.
Start by clicking on "Auto-Post" in your Blog2Social menu.

Since Blog2Social works WordPress user based, please make sure that each WordPress user or author whose posts should be auto-posted
1) is activated with your license key (How do I activate my license key?)
2) has the social media accounts connected (“Blog2Social” -> “Networks”)
3) has the auto-poster configured
>> Follow our YouTube Channel for more useful Blog2Social tutorials <<
Table of Contents
1) Share new or updated WordPress content with the Auto-Poster
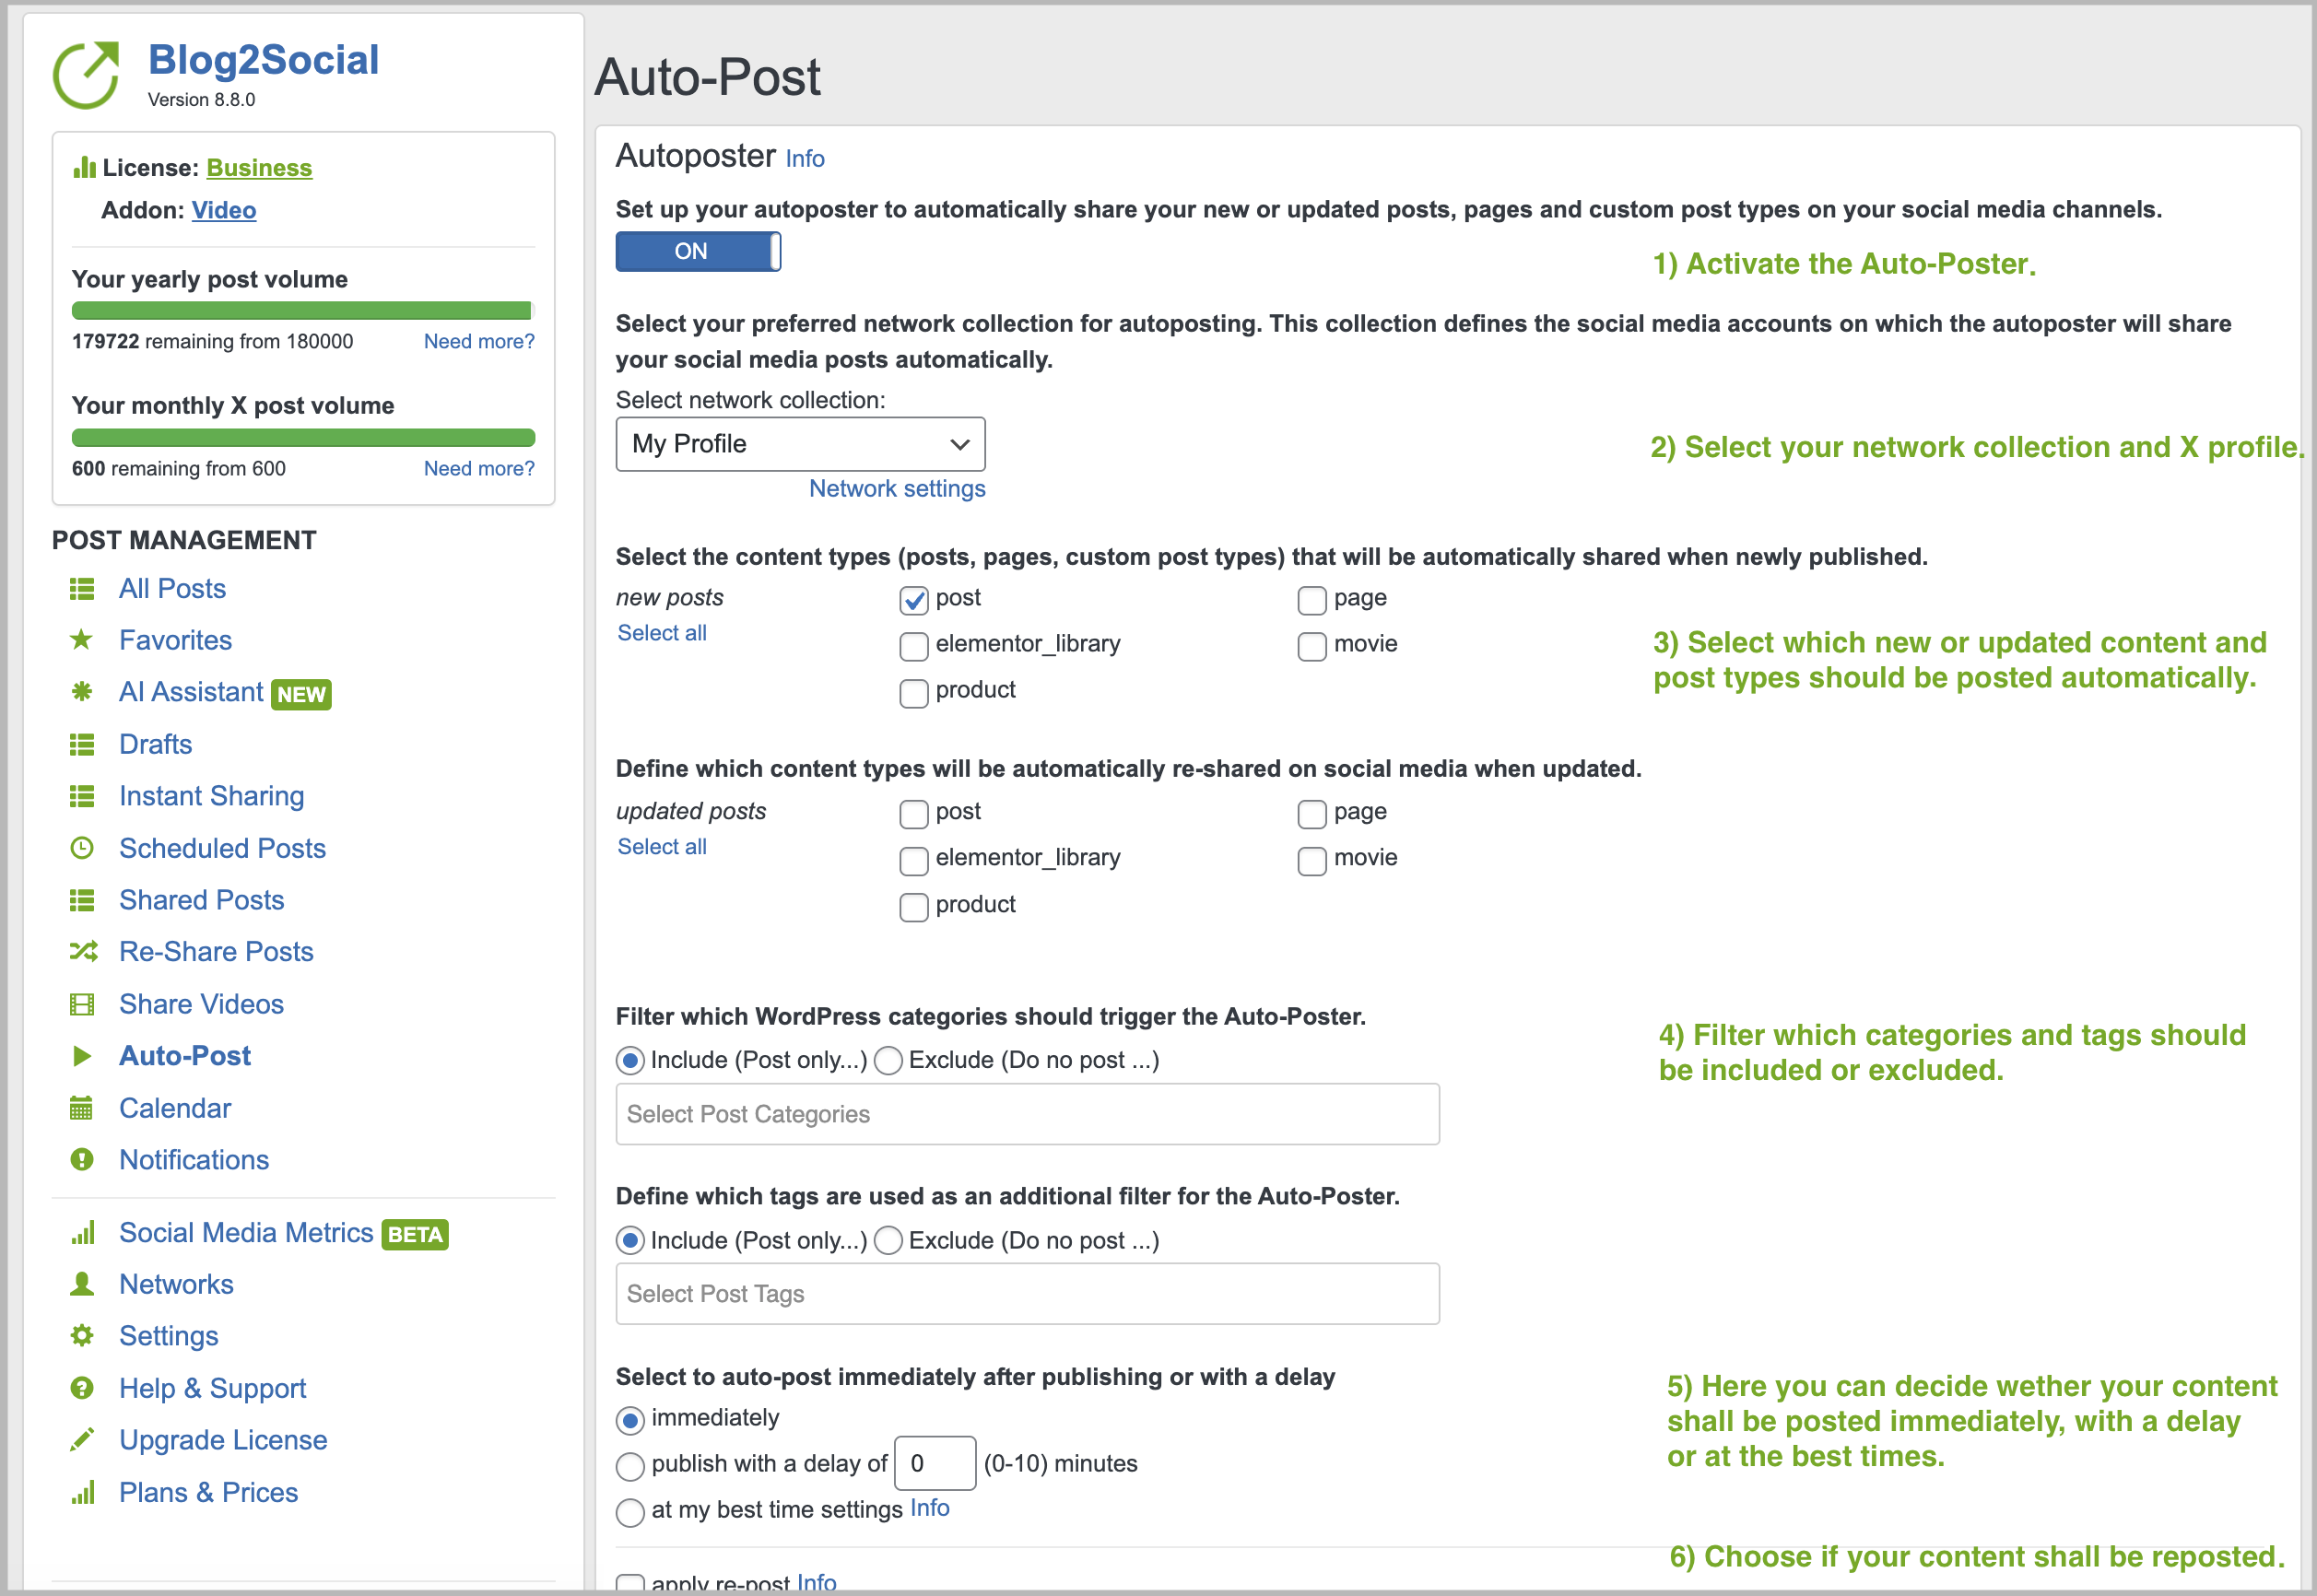
First of all, you can select your "network collection" which includes your connected social media accounts where your WordPress content shall be shared automatically. This way your own original WordPress content will be shared fully automated as soon as you click on "Publish" or "Schedule" in your WordPress post editor.
Please note: If you tick the box "updated posts" your post also will be shared automatically each time you click on "Update" within the WordPress post editor.
Next, you'll be able to filter your posts by category or tag.
Now you can decide whether your posts should be published immediately, with a delay or at the best times. You also can decide if your post shall be reposted after one or two days when ticking "apply re-post".
If you’re facing the notification "Your blog post was not available for the network at the time of publishing", we recommend setting up a delay of 5-10 minutes in your auto-post settings.
If you’re experiencing difficulties setting up the Auto-Poster, please refer to the following guide:
Sharing with the Auto-Poster - Things to check for Troubleshooting
2) Share individual WordPress content with the Auto-poster
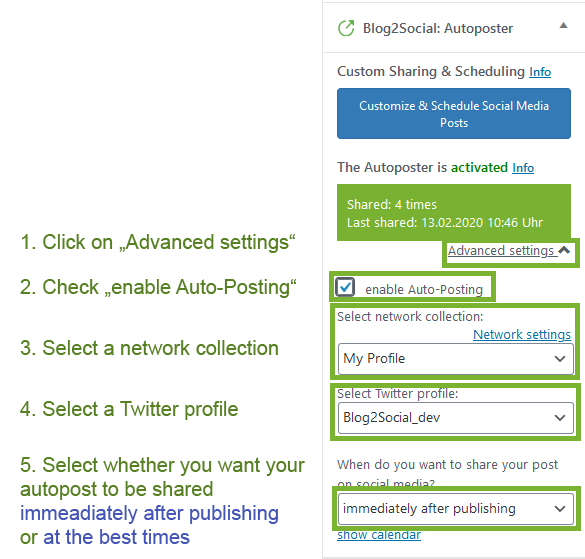
If you want to activate the Auto-Poster for individual posts, open the post or page editor of the specific post in your WordPress backend and scroll the right menu bar to "Blog2Social: Autoposter". Here you can tick the box "enable Auto-Posting".
3) Share imported WordPress content with the Auto-Poster
Content that you import or create via plugins (e.g. WPeMatico) as WordPress content can be shared automatically on your social media channels.
Set up your import plugin and make sure to set your WordPress user as the author of the posts, then follow this guide:
How to auto-post imported content or RSS feeds on Social Media
The Auto-Poster for imported posts can automatically publish your imported content on the following networks:
- Facebook (Profiles & Pages)
- Google Business
- LinkedIn (Profiles & Pages)
- Telegram
- X (Twitter) (additional Add-On required)

Transfer your Auto-Poster settings to other users (Business version)
When using the Business version you can transfer your Auto-Poster settings as well as your connected social media accounts to other users that are activated the same Business license key. Simply start by assigning your license key and connected accounts as described here:
User management: How to assign license keys and social media accounts to other users
Now you can transfer your Auto-Poster settings.
Step 1: Select one or more user in the respective field.

Step 2: The following settings and configurations are automatically applied when another user is assigned for the Auto-Poster configuration:
- The selected network group by the administrator (the network group name for the assigned users is displayed with the label "External" in the network group selection for the auto-poster.)
- The configured "Best Times" time settings if applied by the administrator
- The post templates for the networks in the assigned network group
Step 3: Furthermore, all users as well as the administrator can easily remove the assigned Auto-Poster connection by clicking on "Disconnect", so that the default settings are available again.

Other helpful guides
- How do I automatically re-share Posts on Social Media?
- How to use Post Templates for Social Media Posts?
- Why is my image not displayed in my Social Media Posts?
Tags: Auto schedule blog posts on social media, Auto-Posting your content, automatically schedule on social media, Social Media automation
Most popular FAQs
How to auto post imported RSS feeds
How do I auto-post and auto-schedule blog posts
Solutions: Why does Instagram not publish my post/text?
How do I connect Blog2Social with Instagram?
The connection to the server failed.
How to connect and automatically post to Facebook
I cannot connect my Facebook page
How to automatically re-publish blog posts on Bloglovin’
How to share on Facebook Profiles with Facebook